Stainless Steel Weld Inspection
Inspection Challenges:
Various industries are interested in using phased array ultrasound for manufacturing inspection (“in lieu of RT”) and for in-service inspection of stainless steel (SS) and other austenitic welds: dissimilar metal, inconel, corrosion-resistant alloy (CRA)
These welds are challenging for UT examination, because of sound propagation issues in the coarse-grain austenitic weld structure, for instance high attenuation, high noise caused by individual grains, and distortion of the acoustic beam. Therefore, reliable examination of austenitic welds requires careful selection of inspection techniques.
Although most elements of a “successful” inspection solution for austenitic materials are known to UT experts, on-site deployment of the required inspection techniques is still perceived as laborious and expensive, because it typically requires high-end equipment and software, or multiple software packages.
Recommended Solution & Advantages:
2D Matrix Array Technology
Robust inspection techniques for austenitic steel welds involve 2D matrix arrays placed on exchangeable wedge assemblies, contoured to match the OD surface of the considered component. Low frequencies are to be used, i.e. 1.5 MHz for inspection of dissimilar metal welds and other attenuating materials, and from 2 MHz to 3.5 MHz for homogeneous wrought stainless steel base material and welds.
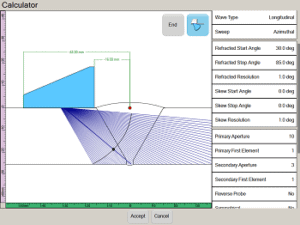
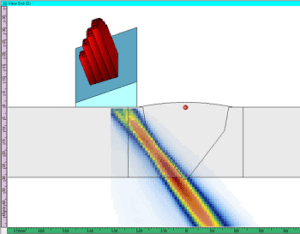
Dual 2D matrix array probes (TRL mode) can inspect the complete weld volume for circumferential flaws, using longitudinal waves from 30 to 85 degrees. The dual configuration offers the following benefits: absence of near-surface “dead-zone”, elimination of “ghost echoes” caused by internal reflections in the wedge, and finally better sensitivity and SNR (signal-to-noise ratio) due to the convolution of T and R beams. Thus, effective inspection through the coarse-grain weld material can be performed. 2D matrix array technology allows for optimized focusing and steering of the acoustic beam, compared to 1D linear arrays.
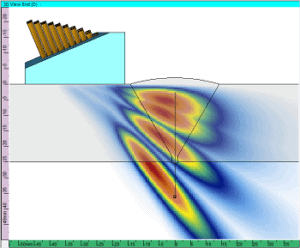
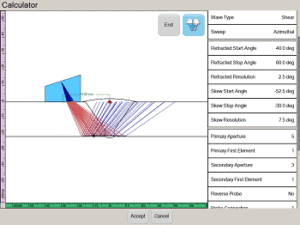
To detect axial cracks (e.g. IGSCC) in stainless steel pipe welds with the weld cap in place, single matrix array probes in pulse-echo mode can be used to “skew” the sound beam under the weld cap. Since the sound beam essentially propagates in fine-grain base material, shear waves can reliably detect flaws at the near-side of the weld.
Multiple refracted angles and skew angles are used to maximize the detection capability. Ideally, the weld should be inspected with 4 beam orientations (CW and CCW from each side of the weld)
Benefits:
Highly effective
-
- Low frequency 2D matrix arrays allow to reliably inspect through coarse-grain austenitic weld material
- Full coverage of the weld volume
No disruption to other activities
- As opposed to RT, the phased array UT inspection technology is not disruptive to other activities
Adaptable
- The solution is easily adaptable for a wide range of long seam welds configurations
Easy to deploy
- Portable phased array system, compatible with automated and manual scanners
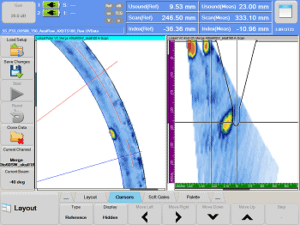
- The on-board UltraVision Touch software enables: rapid preparation and optimization of setup with 2D matrix array probes, on-line monitoring of inspection data using Dynamic Merge Views, full data analysis capability, comprehensive reporting with ensured traceability
Zetec Products:
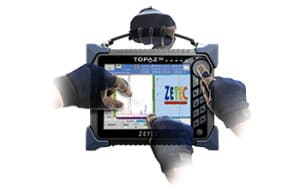
- High-performance portable phased array unit, 32/128PR configuration
- Battery operated, rugged, no air intake
- 64-bit on-board computer, for fast processing
- On-board support of 2D matrix arrays, with guided set-up of inspection techniques, no additional software package required
- Visual feedback on focal laws
- Accurate and on-line imaging of inspection data: S-Scan, Dynamic Merge
- Capability to record large data files
- On-board software tools for reliable interpretation of inspection data in flat and cylindrical geometry
2D Matrix Array Probe and Wedges
- Standard 2D matrix array probes: frequency and active surface optimized for material attenuation and wall thickness
- Two probes attached to a single ZPAC connector
- Element configuration selected for maximum steering capability without relevant side lobes
- Exchangeable wedge assemblies, with minimal footprint in the incidence plane, and contoured to match pipe OD

