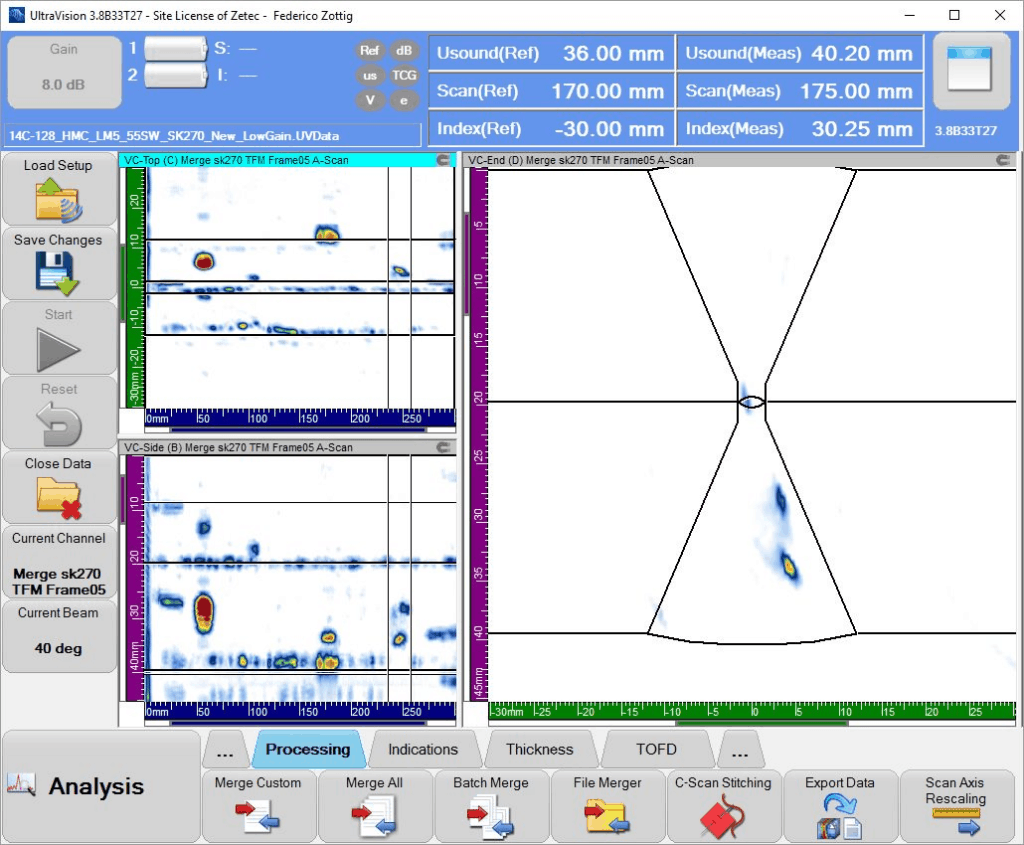
TFM Ultrasonic Analysis Available in Realtime

Ultrasonic testing has been used in various industries for decades as one of the most efficient flaw detection methodologies. With the emergence of approaches like the total focusing method (TFM), we now have access to more advanced data acquisition and analysis technology that is capable of in-depth flaw characterization. However, conducting analysis using TFM involves a huge data volume to generate high-resolution imaging. This requires significant power for data processing.
Traditionally, the data from an inspection would be recorded for later offline analysis. Advancements in technology have now enabled the ability to process data in real-time which is beneficial in minimizing inspection time and facilitating quick decision making.
Total Focusing Method for Ultrasonic Analysis
The total focusing method is an advanced focusing algorithm that utilizes the data acquired by the full matrix capture (FMC) technique in ultrasonic testing. It utilizes the beam returns from multiple angles as the input data from the inspection zone. This data can be collected, digitized, and with the right equipment can either be analyzed in real-time or stored for later processing.
The advanced algorithm of TFM ensures that each data, stored in the matrix grid, is thoroughly processed taking into account every possible beam focus. Each frame of the grid acts as an individual pixel constituting the A-scan signal data. The grid is instrumental in the development of high-resolution imagery which helps in clear sizing and characterization of the flaw. This is mostly beneficial for identifying early-stage HTHA flaws (<0.1 mm), stress corrosion cracking, dissimilar metal weld inspection, and other such minor and difficult-to-spot flaws.
However, with an increasing need for efficiency, industries now prefer technologies that can provide faster data acquisition and processing capabilities. The increased processing power of the more advanced instruments has now made it possible to view the matrix grid to perform real-time TFM ultrasonic analysis for immediate interpretation. The data can be processed and analyzed as the scanning is being conducted. The real-time analysis dramatically reduces the time involved for technicians in the identification of potential flaws within the component being inspected.
Advantages of Real-Time Computing for TFM Ultrasonic Analysis
Advanced ultrasonic testing equipment is available that provides powerful TFM analysis features for efficient computation of the scanned data. This can feature up to 64 active channels and the generation of high-resolution images with up to 1M or higher data points per frame. The option of conducting real-time analysis can help industries in their non-destructive testing (NDT) approach in the following ways:
- Display of detailed images in real-time ensures immediate identification of flaws.
- Faster data acquisition and processing dramatically shorten the time required for inspection.
- The analysis from high-resolution imaging ensures accurate characterization of flaws in the workpiece.
- It is possible to perform TFM ultrasonic analysis of data as the scanning process is being conducted.
- The on-the-spot analysis enables technicians to allocate resources in the case of flaw detection and if any repairs are required, avoiding unplanned downtime.
TFM Ultrasonic Analysis Solutions
The most significant advantage that TFM ultrasonic testing offers is its capability to effectively acquire data and produce high-resolution images. The concern for system overload and slow down during data acquisition due to the high volume of data can be eliminated by the use of advanced data processing ability provided by high-performance ultrasonic testing equipment with advanced focusing capabilities.
With TFM, it is possible to carry out the volumetric inspection of a complex structure, and in a faster, and cost-effective way. With UT instruments such as Zetec’s TOPAZ 64, data acquisition with TFM can provide highly accurate flaw detection and analysis.
Zetec is a global leader in nondestructive testing solutions for the critical inspection needs of industries the world counts on every day. Our UT testing equipment with advanced TFM algorithms ensures that every minor flaw that can hinder your process is identified in real-time. To learn more, contact Zetec today!


