Ultrasonic Probe Types: Understanding Their Differences and Applications

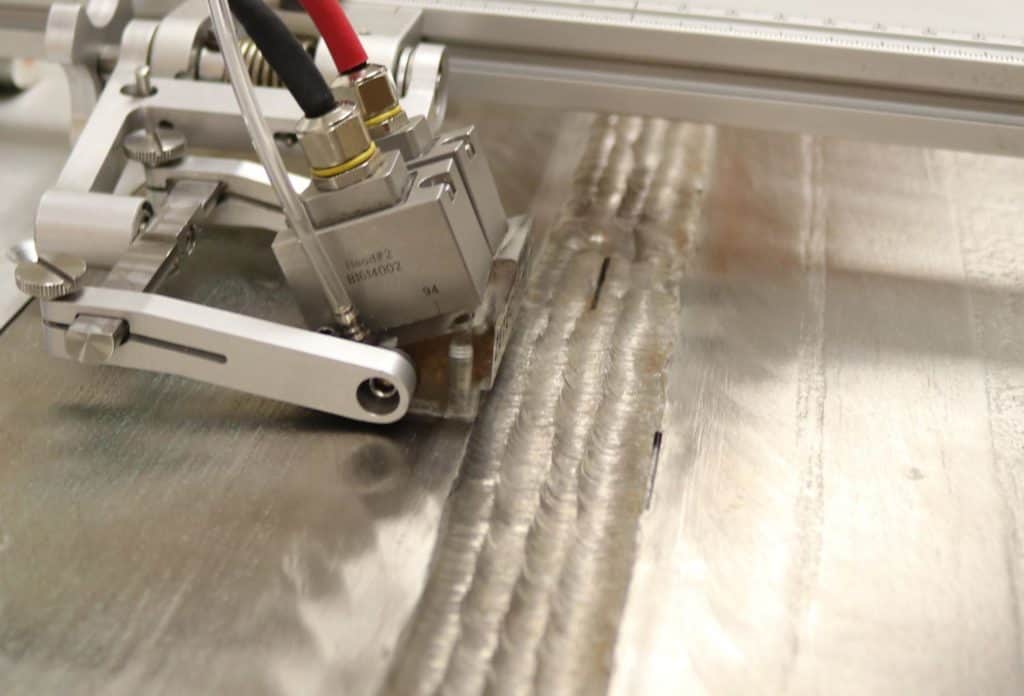
Probes are a key part of any ultrasonic nondestructive testing (NDT) inspection procedure. They generate the high-frequency sound waves that are used to map surfaces. With this map, technicians can inspect for corrosion and identify flaws. That’s why selecting the correct probe is crucial.
Without the correct probe, flaws smaller than those detected by a standard ultrasonic probe will likely go unnoticed. Not only that, but cracks that branch off or have unusual orientations can be missed or improperly sized. Probe designs dedicated to these challenging inspection configurations can solve these problems.
In addition to these challenges, there are often regulatory standards that determine the kind of inspection tools that can be used. This is often the case in heavily-regulated industries such as aerospace and hydrocarbon extraction.
The technical and regulatory requirements combine to mean one thing: technicians need the right ultrasonic probe type—the kind that best suits the given job. When it comes to selecting the right ultrasonic probe type, it’s important to understand their differences.
Types of Ultrasonic Probes
1D-Linear Array Probes
Standard 1D-linear array probes cover the requirements for most typical weld and component integrity inspection configurations. A low-profile phased array probe is ideal for detecting small flaws in thin-wall pipes. These can include corrosion, cracks, and other minute flaws.
Low profile 1D-linear array probes should be able to operate in small areas due to their small profile. In fact, some low-profile probes can operate with only 11mm in clearance. This gives them a smaller footprint than most standard linear probes. When the navigation is tight, a low-profile 1D-linear array probe can get the job done.
Some advanced 1D linear array probes designed for the total focusing method (TFM) have an extremely small pitch and very high-powered imaging capabilities. They may also have a curved active element which helps the 1D-linear array probe focusing and resolution in comparison to other probes.
Some of the benefits of advanced TFM 1D-linear array probes include:
- Maximum effective steering range
- Improved TFM imagery
- Sharp focusing
- Improved lateral resolution in passive plane
2D-Matrix Array Probes
2D-matrix array probes have a beam-skewing capability that allows them to better detect misoriented flaws. They do so by using compression waves, which, when compared to shear waves, are less affected by propagation through anisotropic materials.
This sensitivity is why 2D-matrix array probes are used in the inspection of coarse-grained, austenitic materials, dissimilar metal welds, and corrosion-resistant alloys. These materials tend to have skewed, non-linear flaws, requiring greater sensitivity and more ability to detect a flaw from a non-traditional composition.
These probes can be controlled at multiple angles. The refracted angle and skew angle can be varied simultaneously, for both LW and SW beams. This contributes to the small pitch, making it easier to maneuver in complicated inspections.
Some of the primary benefits of 2D-matrix array probes are:
- Two-plane steering capability
- Improved detection and characterization of skewed reflectors
- Improved detection and characterization of misoriented flaws
- Simultaneous multi-skew inspection capabilities, negating the need for additional inspection sequences
Not every inspection is linear. When different angles are needed, a 2D-matrix array probe separates the signal from the noise.
What To Look for in an Ultrasonic Probe
There are a lot of different kinds of inspection jobs, all with their own considerations. What kind of access does the inspecting technician have? What materials were used in the weld? What conditions exist around the inspection (high temps, humidity, etc.)? Essentially, what is being inspected, and how.
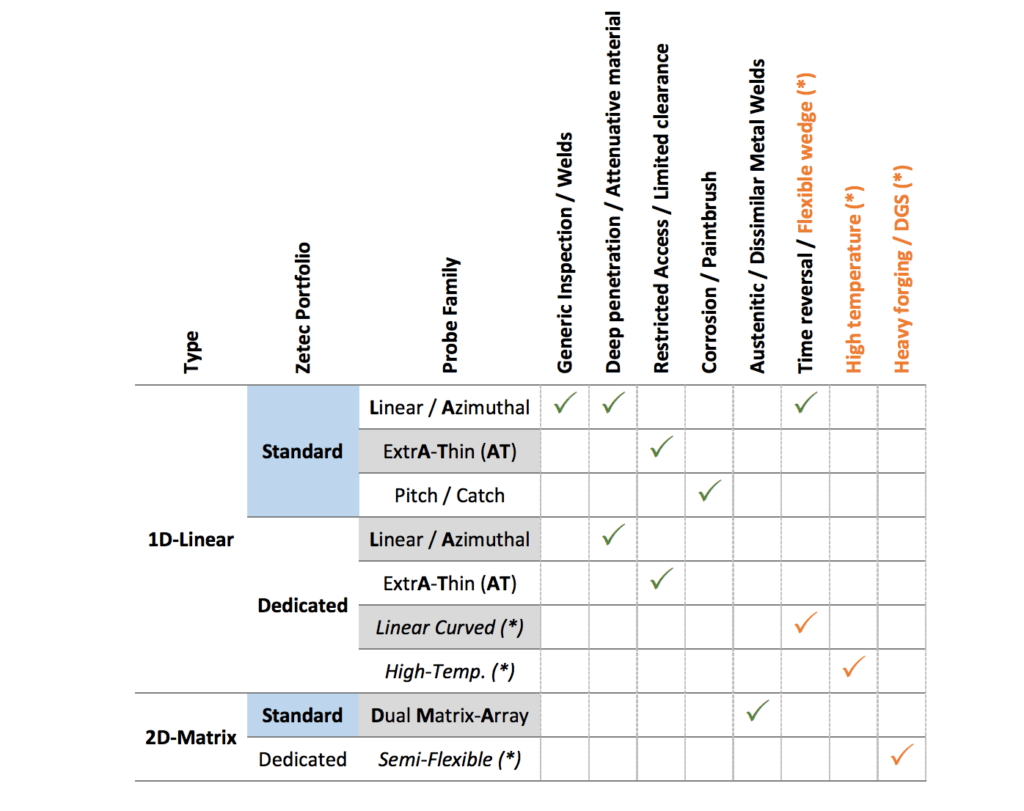
That’s why it is so important to know the different capability of 1D-linear array and 2D-matrix array probes. Each job requires its own distinct tool. Here, as a way of showing the diverse range of the tools, is a comparison of ultrasonic probe types offered by Zetec.

Ultrasonic Probes for Your Nondestructive Inspection Needs
Ultrasonic testing is important for most industries that require a full volumetric examination of its components. But while standard ultrasonic testing has some limitations, phased array ultrasonic testing (PAUT) gives this form full expression.
PAUT is more agile than standard testing, and can find anomalies in even non-standard materials. Detection of misoriented flaws and corrosion in extremely thin materials can often only be done with PAUT probes and wedges.
Zetec is a leading supplier of these probes and wedges, and the full component of ultrasonic testing instrumentation and software required for a comprehensive testing solution. By leveraging these advanced PAUT capabilities, technicians can find the flaws and cracks in a surface before they become larger.
Having the wrong ultrasonic probe type can sometimes give you the same amount of actionable results as having no probe at all. Finding a partner who can help you create a solution that meets regulations and exceeds expectations gives you the biggest picture of the smallest surfaces.
Zetec provides exceptional phased array ultrasound testing equipment for a wide variety of industries. To find the NDT equipment which best suits your testing needs, contact us today!
